Don’t be jealous, but we are living at the height of luxury around here lately. Check this out:
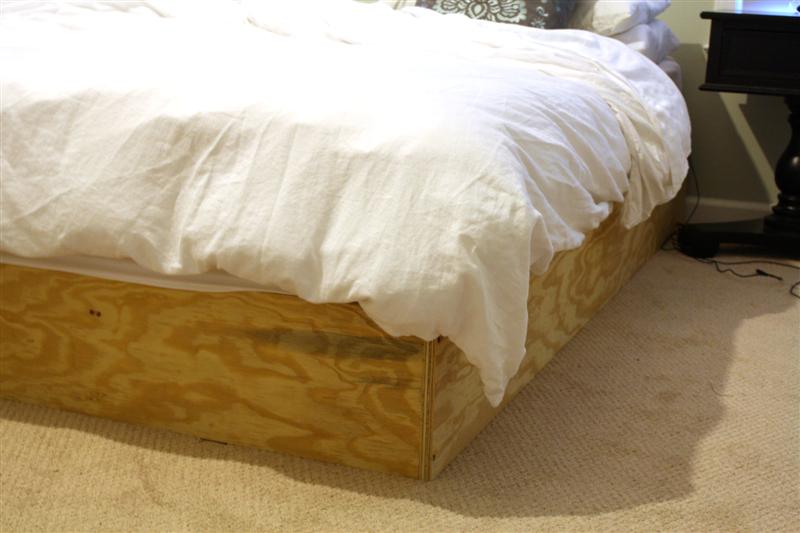
You saw that right: our mattress no longer sits directly on the floor. It is separated from the carpet by nine inches of the most incredible spectacle of human engineering ever seen… on this blog… today.
That’s the platform which we will reupholster for our bed (More on the bed here and at the links at the bottom of this post.) It still needs legs. This first part probably took us 1.5 or 2 hours total. I’m posting a how-to for this part alone, because a post on how to build the entire bed at once would take up the whole interwebs.
This is what this bad boy is going to look like all assembled. Except in the picture, it looks like it’s not perfectly square, or perhaps space has been warped into some other dimension. That is not the goal for the finished product. Click on the photo to bring up a larger version with all the measurements laid out for you.

1. Cut all your boards. Here’s a handy cut list for a queen-sized bed:

2. If at all possible, you want to assemble this in the room where it will live. It’s gonna be heavy, and once it’s upholstered, there’s no breaking it down into parts for easy transport.
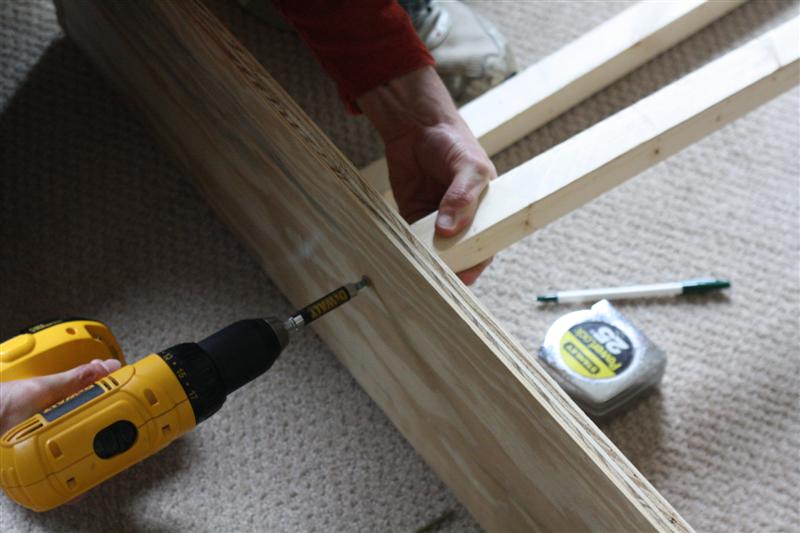
Lay your nine-inch-wide plywood boards on end like this:

And screw them together. If you’re a total noob like me and you’re already getting concerned about what kind of screw to use, how to screw it in, yada yada, Andy tells me you can relax. He actually used drywall screws and promises that whatever you use will probably be a-okay. He’s giving you a thumbs-up to use whatever’s handy. But probably not Elmer’s glue, deal?


Note that at this stage, the platform makes an excellent obstacle course for small people.

3. Add your side cross-board supports. Andy has a two-inch-wide straight-edge (that long straight metal thing in the picture), so he clamped that to the top and used the width as a template. He drew a pencil line below it, and screwed the side cross-board support in right up against the pencil line. This might make more sense by looking at the pics.

Drawing the pencil line:

Support board is screwed in along the pencil line, two inches from the top of the plywood strip:

You only really need the side cross-board supports along the long ends of the bed, not on all four sides. We didn’t realize this until we were done, so we get extra credit for unnecessary work and expense. WOO!

Not necessary.
4. Add your center cross-board supports. I’m talking about these guys going down the middle:

If you’re smarter than we are and didn’t put in the unnecessary cross-board supports on the short ends of the bed, you’ll be screwing these right into the plywood, two inches from the top.


Sorry for the change in lighting here. We took a quick break to attend to one very cute one-year-old, and didn’t get started again until after dark.
(Newsflash: babies do not understand that it would be better for them to continue a nap until all of your most pressing projects are complete, and you will wake them when you’re ready for them.)
5. Now it’s time to screw in your cross-boards. We used 12 evenly-spaced boards, but there’s nothing magic about that number.
Make sure everything is square as you go:
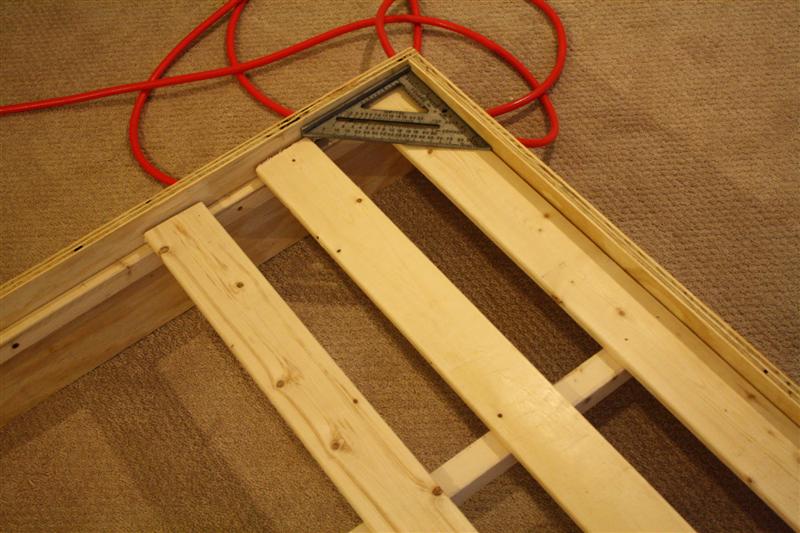


Then, plop your mattress on top and wave buh-bye to your boxspring. You won’t be needing that bad boy anymore, because you just built your own using wood, metal and tender-loving care.
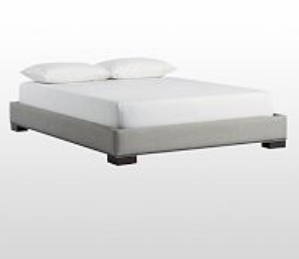
You could actually add legs, stain the frame and stop here for a raised platform bed, like this one from Pottery Barn:

You could even upholster just the frame and forego the headboard, like this one from West Elm:
Heck. You could inscribe hieroglyphics in the side, paint it pink polka-dots and set it on fire. Because it’s yours and it is infinitely customizable. How ’bout that?
Or, you could stick with us as we recut the headboard, then upholster everything, screw in the legs and wonder why we didn’t finish it sooner.
Update: Check out the other bed-related posts, where we:
- Built a bed
- Decided to scrap it and start over
- Talked about how to choose a great upholstery fabric
- Chose a fabric… then changed our (okay, my) mind
- Shared our supply list and cut a headboard
- Upholstered the bedframe and upholstered the headboard
- Added the legs and finishing touches
 Hi, I'm Kelly. Glad you're here! This little blog is where I chronicle our efforts to fix up our beaten-down home on a tiny budget. We're not there yet, but here's a peek at the view along the way...


Lost all my comments on this post so far… 🙁
You created a great post with excellent information, i learnt a lot of stuff from this article.
I like DIY articles, but at times, we must admit that we can just buy those stuffs at reasonable prices and not push too much of ourselves to be doing DIY.
Hey Kelly, so glad you posted this!
Months ago when I was new to this blogging world I adored this post! Unfortunately I didnt understand how blogger worked and forgot which blog I read it on. I really wanted to use your instructions to make a bed for my daughter.
Just wondering if you might consider making a page with your tutorials on it just to make them a little easier to find?
Thanks to you and Andy both for this excellent plan. I’m looking forward to getting to building this!
Hi Kelly!
Great blog. I just completed building the frame! Including the trip to Home Depot, it only took a couple hours time. And I was able to construct it on my own.
Next step is to find some new bedding… then I will decide whether to paint or upholster the frame.
Very helpful and entertaining. Thank you, thank you!
Whew! Just got back from Lowe’s. I didn’t have a coupon, but I did have a $100 gift card I had won, so I cut my losses with the coupon (couldn’t find the one my hubby just brought home, but we’re redoing our kitchen right now, too so I’m sure I’ll find a time to use it when I find it!!!)
Got everything from the list on your last post for the wood…haven’t made it to the craft store, that’s for tomorrow after the frame is built and the headboard cut out.
Thankfully my hubby and dad have all the tools I need and don’t have to purchase those!!!
SO EXCITED! Thanks from the bottom of my heart for the directions ;o)
Rachel
Hi Kelly!
I read your supply list and the steps for the bed, but I am not seeing where you used the 2×4 studs listed in the materials list… Am I missing something?!
Thanks,
Hi Kelly!
I read your supply list and the steps for the bed, but I am not seeing where you used the 2×4 studs listed in the materials list… Am I missing something?! I’m adjusting your plan to make a king-sized bed, so I want to make double-sure the studs will work…
Thanks,
Sorry for taking so long to respond! Things have been crazy here lately. You can see the 2×4 studs in this pic: https://lh5.googleusercontent.com/-SbrMHJM8pCs/TXzmylkCA2I/AAAAAAAACKg/42E7lGVe0Bo/s320/Picture+326+%2528Medium%2529.jpg
There are two of them that run the length of the bed, and they support all the cross boards. Does that make sense? 🙂 Let me know if not! And if you make the bed, I’d love to see pics! Good luck!
Hi, I realize this post is pretty old, but I’m sure glad I found it! I’m looking to build a standard king sized bed and was wondering if you can tell me the adjustments I should make when building the frame. I’m pretty new to the DIY phenom so every ounce of help is appreciated 🙂
Hi Kelly,
I realize this was posted a while back, but I just found the plans and I love the simplicity of the frame so much I’m going to (attempt to) recreate it myself. But I’m totally new to DIY — this is my first venture into any kind of building, and I’m just wondering if there’s any specific kind of wood you used for the supports and crossboards?
Thanks for posting such a wonderful and simple guideline to follow!
We just used good ol’ pine! It’s the cheapest kind and does the job. If you build the bed, I’d love to see pics! Good luck!
Hey I was just wondering about how much this entire project cost to make? including reupholstering and not including reupholster? I haven’t decided which path I’m going to take with it yet. Also, how heavy is it? I am going to make it in my dad’s shop and drive it two hours away to my house in Columbus!
It’s a complete guide of Platform Bed. Thanks to share this post with us. You guys perform always stunning. 🙂
Hey, is there any way to convert two twin size box springs ( I have a king size bed) into that?
You might be able to wrap the fabric around the box springs and staple it on… I’ve never tried it but that’s my first thought. Good luck!
I want to build this for my room, but I have a full sized bed. Would your dimensions work for me? And also what was the cost of this project? I am trying to re-do my room at a cheap price. Thanks!
Nope, you’ll need to scale it down. These dimensions are for a queen sized bed. The cost depends on the materials you use. Fabric can run a wide range of costs, but for us it was around $270.
Hey there, I’m about to start building the bed frame following your measurements but I’m a little confused because a queen size mattress is 60×80 and your measurements inside the frame are 79×59.5. How will the mattress fit inside the frame, or am I missing something here?
You may need to adjust if your mattress is a different size. This is what worked for our mattress.
no, the measurements are 59.5 by 80.5, the reason the one for the width is shorter than the bed is that it was measured to take into account the width of the ply wood. You put it together with the long sides on the outside and small ones on the inside which add an inch and a half to the width of the bed, 59.5 plus, 3/4 on an inch in each side, which makes the finished platform 61 in wide by 80.5 in long.
???
Hi there,
I am obsessed with this bed and your work 🙂
The only thing I don’t understand so far is how did you screw-in the cross-boards so that they won’t fall when you plop the platform?
Did you use any screws/nails on them into the side support or middle support?
Thanks,