There’s a common problem in interior design that no one talks about. It’s all very hush-hush, you see. It’s the problem of the lamp cord. (Yeah, I said it.)
Everyone always wants to pretend like it’s not an issue. Like they can just plop their desks right down in the center of their room and their lamps won’t even need access to an outlet.
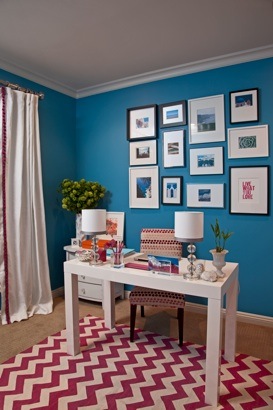
Like their lamps don’t even come with cords. Like they do all their office work in the bright noonday sun, what do they need a functioning lamp for anyway?
But let’s talk reality. Sure, centering your desk in the middle of your office seems practical:
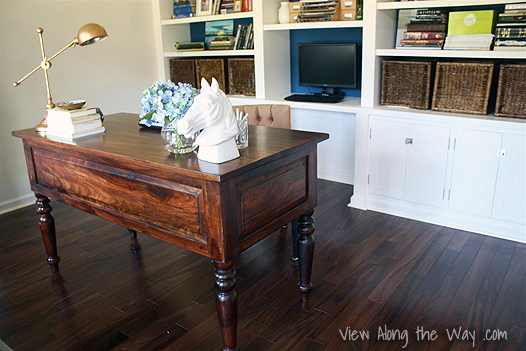
You get to face the door of the room from where you sit at your desk, which easily earns you an A-plus from the feng shui overlords. And keeping your desk away from the wall opens up your wall space for lots of storage.
But there’s one problem. Unless you want to pay your bills whilst shrouded in the darkest pitch-black night (and for real, you might), you’re going to need a lamp on that desk…
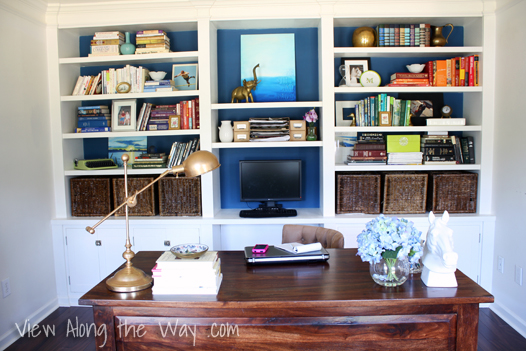
And that lamp is going to come with a pesky cord which is a trip hazard and most importantly – of course – an eyesore. Let’s be honest, how uncool and annoying is this mess?

But if you’re not willing to compromise the room layout you want (and you want to appease the feng shui geeks), you can have your lamp and light it too… without the cord.
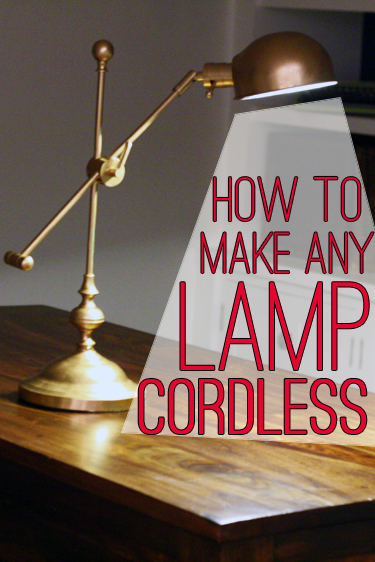
This is how we took our sad little rescue lamp, the $1 yard sale find that we fixed up in this post:

…and hacked it up to remove the cord so it can sit on the desk we have centered in the middle of our office… without that pesky golden cord.

So here’s a little tutorial on how to make any corded lamp battery-powered!

Materials You’ll Need
- Lamp. (See how to do this with a shaded lamp in this post)
- 9-volt battery or 8 AA batteries (to save money, use rechargeables) Update: we recommend the 8 AA batteries in hindsight. The 9-volt was too dim.
- 9-volt battery clip (like this, only about $2 shipped) or an 8 AA battery pack (like this) Update: we recommend the 8 AA battery pack, in hindsight. The 9V was too dim.
- Wire strippers
- Strand of LED lights like these (more on this in a second)
- Soldering iron (we use this one) and solder (like this)
- Optional: velcro and felt to cover the bottom of the lamp
- Optional: brilliant husband (not available on amazon)
1. Open bottom of lamp.
The bottom of the lamp had a piece of felt which we just peeled right off:


2. Remove top of lamp.
Update: see the post on how to do this step for shaded lamps here.
We just unscrewed this round thing (nut?). Every lamp will be different, but there should be some way to unscrew it and remove the top.


3. Connect the lights to the top of the lamp
We are using these magical, fantastic LED reel lights, which we LOVE. This is what they look like when they come in the mail:

It’s a flexible strand of lights that you can cut to any length, which uses almost no energy and is cheap. We used them to light our bookshelves (see that tutorial here):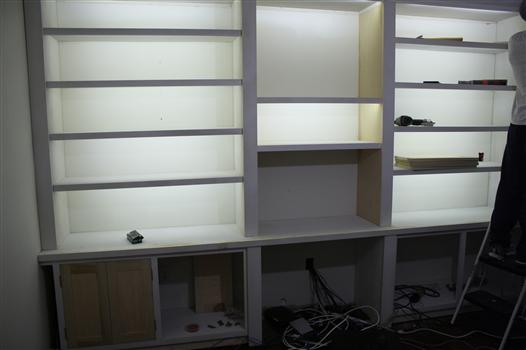
And just for fun, here’s what they look like with the whole strip lit by this one 9-volt battery:

The end of the light strip has a red and a black wire and looks like this:

Okay, now look at the part of the lamp where the lightbulb screws in.

You’re going to solder the red wire of the light strip to one metal piece and the black wire to another. At this point, it doesn’t matter which wire goes to which metal piece.

Cut the light strip to a desired length. We used about two feet of lights. If you look closely at the actual strip, there’s a line about every two inches where you can safely cut it. Here’s a little diagram:

UPDATE: Mark just left a comment pointing us to this LED light which screws right into the bulb socket. We haven’t tried it, but it might allow you to skip the step of soldering the strip lights to the lamp, and just screw it right in. You’d still need to connect the battery pack as we discuss below.
5. Reattach the top of the lamp
Now that the lights are connected to the lamp at the bulb socket, we threaded them through the hole in the top of the lamp and screwed that nut thing back on.


The LED strip lights have a peel-and-stick backing, so you take off the paper backing…

And just stick the lights to the inside of the lamp anywhere. It doesn’t need to be pretty. Unless that’s important to you.

…Almost done!
6. Wire the bottom of the lamp to the battery
Moving back to the bottom of the lamp, cut the cord a few inches away from the base. (Scary, I know! But we’ll get this bad boy working in no time.)

And pull the wires apart:


Using a wire stripper, strip the ends of each wire:

Now you’re going to solder the ends of these wires onto a 9-volt battery clip like this:
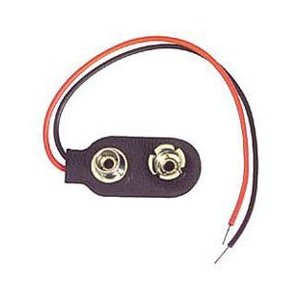
These are SUPER cheap – like about 2 bucks after shipping on amazon here – or you can steal one from some old 9-volt electronic, like we did with this old alarm clock:

UPDATE: We made this light using a 9-volt battery pack and a 9-volt battery, but we’re going to switch it over to an 8 AA battery pack and run it on AA batteries to make it a little brighter. I’d recommend running yours off 8 AA batteries too. All the instructions are the same, you’ll just use an 8 AA-battery pack instead of a 9-volt battery pack, and put AA batteries in it instead of a 9-volt.)
Clip the battery pack onto a 9-volt battery and hold the wires up to the lamp wires. See if the lamp lights up. (Make sure the switch is on!) If it doesn’t, switch wires.

YAY! We have LIGHT!
When you find which wire goes where, take off the battery, twist the wires together and tape them with electrical tape. We soldered them too, but that’s optional.

Attach the 9-volt battery again and tuck it inside the lamp. Then just put the lamp back together. We stuck the felt piece back on and added some velcro so it stays on but is easily removable to change the battery.

We had most of this stuff on hand, the only cost to us was the strand of LED lights. We only used 2 feet of lights, and we have lots of plans for the leftovers!
How well does it work?
So far, so good! We’ve run the light for about 8 hours total and it’s still going strong. If you’d like your lamp to be on the brighter side, opt for the 8-battery pack, because it offers 12 volts of power. The 9-volt will run slightly dimmer.

Update: We’ve decided the brighter AA is much better, so we changed our lamp over. To give you an idea of brightness, our lamp is slightly brighter than a 40-watt incandescent bulb and slightly dimmer than a 60-watt.
And that’s the story of how our sad, lost little rescue lamp dusted itself off, found a new home, got all fixed up and is now going places with his life. Going where ever it wants, really. Because it doesn’t need access to an outlet.
UPDATE: Check out the new post on how to do this for lamps with shades here. See our other lighting projects here and our tips and hacks here.


This post contains affiliate links.
 Hi, I'm Kelly. Glad you're here! This little blog is where I chronicle our efforts to fix up our beaten-down home on a tiny budget. We're not there yet, but here's a peek at the view along the way...













You kids are geniuses. I do my best work in the shrouds of dark night so this is a fix that I may need some day. What’s next for Lamp? Harvard Law?
**Broadway!**
Yeaaaah… I’m reminiscing the Brave Little Toaster now.
and little orphan lampy lived happily ever after, until its batteries died. then daddy warbucks replaced them. and again, happy ever after.
This is sooo clever! I really don’t like lamp cords either and I often think that with room layouts – where do they hide the cords?? I would never have thought you could do this though. Brilliant!
Neato! Great solution. I love how creative you got.
Super cool idea. I’d burn my house down if I tried it..but it’s still genius. I am not.
Brilliant!!! I always wonder about those staged rooms that have lamps with no cords….now I shall never wonder again.
If you notice most of the staged rooms are showing in the daytime- They probably just cut the cord off or shoved it up into the base for the shoot 🙂
Holy handy woman!! Way to put the rest of us DIY’ers to shame! 😉
That is a cool solution. Bet this little cordless lamp gets it’s head Pinned off!
xo Heidi
Pretty much the best tutorial ever! Thanks for sharing 🙂
Yer a freakin’ GENIUS! I would have never thought of that and would have simply lived with lamps that had to sit against walls… and now, oh yes, NOW my lamps can move and sway and dance with me into any room and any location!! So awesome and totally pinnable!! You rule!! xxx
WHAT? You can just REMOVE a cord?! Lady, you’ve opened up a whole new world for me today!
BRILLIANT!! Pinning, google plusing and will totally be doing this sometime. Awesome!
That is such a good idea! And it opens up so many more decorating opportunities!
That is CA-RAZY Kelly! I have often been frustrated by a table that needs a lamp but the cord poses such a problem…..tripping hazard and unsightliness! You and Andy saved the day – thank you! – I am totally doing this!!! (Except you make it look easy and I’m sure to make a disaster of it!)
Yes but how many hours before a battery change?
So far we’ve used our lamp for about 8 hours and it’s still going strong! We’ll try to update this when the battery dies.
Looks like batterie duration is insane…
Pls update as it is essential in my opinion. 8hours cool but if i have to get a new Batterie multiple times a week this is a bit of a minus
How bright are the LEDs – if you need more light, do you just cram a longer length of the strip in, or is there a peak lumens/foot-candles you can get to?
From what we can tell, for this particular application, we don’t think more lights will equal a brighter lamp but we didn’t really experiment much. It’s definitely worth trying though – doesn’t hurt to experiment with a longer strip before you cut it. (If you try it, let us know what you find out!) To maximize brightness, definitely use 12-volt power (the AA battery pack).
Do you have to buy a different battery 12volt battery connector for using the AA batteries? So do you have to turn the lamp upside down, remove bottom felt and unplug the connectors every time you want to turn it off and on? Love your idea and application for bookshelves too!
Lyn
“So do you have to turn the lamp upside down, remove bottom felt and unplug the connectors every time you want to turn it off and on?”
This is a great question. I’d be interested in knowing the answer as well…
Oh never mind, I actually see the answer a few comments down. 🙂
Yall are a seriously great team! What a great project.that little lamp didn’t know what the future had in store when it went home with you!
ummmmmmm SUPER cool!! AND you made it looks so so easy! I LOVE this idea because I agree I HATE cords! :o) Thanks for the inspiration!
Jaime
I swear y’all think of everything!
LOL
I did it over a year ago!
– but with rechargeable battery – i never more buy a battery 😛
can you put a solar panel piece attached the battery source so as teh light is on it is charging rechargable batteries?
I love the way you think! It probably could work and I bet you could hack one of the little solar garden lights to do it. Not sure how to make it pretty though? If you figure it out, I’d love to see!
How I hate those lamp cords! But now thanks to you the world no longer has to see those yucky things. Bravo Mrs. Kelly!
P.S Thanks for sharing my post on FB!!!
This is SO true. I’m beyond impressed with this solution. Love, love, love!
How do you turn it off?
The instructions provided keep the switch functionality. The two-step soldering on the head and then on the bottom of the lamp ensures that the energy passes though the lamp’s original switch.
Yes! You can, and we have. We used separate strips for each shelf of our bookshelves, and you can see how we connected them here: http://viewalongway.wpengine.com/2012/01/how-to-install-inexpensive-energy-efficient-under-cabinet-lighting/
Can you use sections of the reel of lights for more than one project, or is it too hard to attach more battery wires?
You can as long as you know how to solder.
I saw this on Pinterest! Go Kelly!! Genius.
You are amazing. I’m checking out your other post, we have three closets in a home built in 1937, so no lights in there. This would be way better than hiring an electrician and messing with our old wiring! THANK YOU!!! I hope this post goes nuts on Pinterest for ya 🙂
Thank YOU! 🙂 I have a post on how we lit our closet (right here: http://viewalongway.wpengine.com/2011/06/four-dollar-pantry-lighting-solution/) We didn’t use the same LED lights because we didn’t know about them yet, but if we could do it again, we would. I’d love to hear how it goes for you! Thanks again!
Awesome! I had no idea this was even possible. Pinning!
So I just found this via lifehacker and one person raised an interesting point, landfill bound batteries vs socket. So I was wondering on have you tried slapping in a battery from any of the rechargeable lines? The AA 8-pack with rechargables sounds like a good idea. Hey maybe there’s a future article here on greening projects like this! 😉
We haven’t tried that yet, but it’s a great suggestion!
Could you re-purpose some batteries from old laptops? I have three broken laptops all with still good batteries. I’d like to see those batteries reused somehow rather than put them in a landfill.
Seems like that would work if you can come up with a good way to charge the batteries.
Hi Kelly – electrical engineer here – just for reference, the 8 AA batteries are going to last a LOT longer than the 9 volt battery! Those AAs will have about 10x more battery “capacity” (measured in the amount of electric charge they store) than the 9V. Great project!
Didn’t know that! Thanks so much for the professional input!
ummmm i would have never ever figured this out. And to be honest, I was a little lost just reading this, but hubs read it said- oh awesome! So i’m taking that to mean he can do this for me? you guys are geniuses!
Stop being so smart. You’re making the rest of us look like nincompoops.
this is seriously an ingenious swap!!! I don’t have a need for a cordless lamp at the moment, but I’m trying to think of one for sure!!!
I love this and am going to try it. I have a question about lamps with shades. Where do you put the LED lights?
I think it depends on the shade. I’m looking at a lamp like that right now, and the shade has a wire thing that goes around the lamp bulb. If I were hacking this lamp, I would just wrap the lights around the lamp shade cage… if that makes sense. Good luck!
Great idea; thanks for sharing!
Found this via Pinterest – I will repin, and I can’t wait to try this out for myself. I know that when they stage these things for magazines they just tuck all the cords out of the way, so I love how you turned one aspect of a staged photo into Reality!
I also love how you make soldering sound so doable. And the LED lighting strips seem to give such a nice, even light coverage. I cannot wait to give this a go! Thanks for all the links to the resources, too.
Off to go poke around the rest of your site. Thanks again!
Great idea!
And to think I actually had outlets drilled in the middle of my rooms so I could plug in lamps! I’m all about free floating furniture and lots of light – this is the perfection solution to those unsightly cords!
Kelly
We shared your brilliant tutorial with our facebook fans….. I hope that’s ok…….
We love you! Brilliant!
Holy cow, uncording a lamp?! That’s like defying gravity or some other law of the universe. You brilliant law breakers, you. Amazing!
I am surely going to try this … It will come in handy when the power goes out again!
I think you can improve your development changing the original yellow cord that you keep in the lamp:
Change it to a lighter cord (like one with same thickness than battery socket black/red cord)
Doing this you reduce wire capacitance and resistances, improving lighting and battery life
Hi I was just wondering if you could stick the lights on an old light bulb and put it back in the lamp as you usually would only you would see led instead of the usual way the bulb would work. The lamp I want to use has no other way to apply the led as the shade is like a hurricane type.
I’m just wondering if an LED bulb would work so you don’t have to go to the trouble with the string?
I like the idea of putting in a lower capacity wire, thanks Spuck!
I can’t wait to try this; our living room could do with wireless lamps! Thanks!
LED bulbs that you buy in the store are 120volts. You might be able to buy a 12V bulb online. It’s important that the lights aren’t more than 12volts, because the battery pack only provides 12V of power. Hope that makes sense! Usually the 12V LED bulbs are a little more expensive than the lights strips, maybe $30? That’s why we love the strips so much. But try it out and let us know what you find! I’d love to hear if it works
This is such a cool tutorial! Although I still don’t understand what the LED strip is for. Could anyone “illuminate” me? 😉
The LED strip is the source of the light. 🙂
HELP!!! HELP!!! Brillent idea and I’m sure it’s us (My son and I) but we don’t have light. We sit alone..in darkness. Kind of.
Our Story:
Keep in mind I didn’t know you had to buy solder (and argued with my son when he said I did–because well the instructions didn’t say to buy solder). Ok we established I’m not terrible bright….but my 16 year old is pretty handy when I don’t argue with him. The lights are attached at the top of the lamp and at the bottom. It is a shade lamp but I figured we could follow the same steps and stick the lights inside the shade (we experimented with an old cheap working lamp) but when we were done we did not have light. Any thoughts? Wait I have another questions…we bought the lights from the Amazon link and one end had the wires and the other end has a sort of plug. Now that I have cut the lights how to do I use the rest of the strand of lights since there was only one end with wires and what is the plug (I think it’s a plug at the other end) for? If everyone is laughing hysterically at my dim witted questions—I’M SORRY but pinterest hooks me in—excites me and I try..and if you have a 16 year old boy you can imagine the eye rolling I have to endure…so PLEASE BE HELPFUL AND KIND. Thank you for trying to enlightening me.
♥
PS I bought every thing in the instructions from the links except the solder.
SO sorry for the delay! Things have been so crazy around here. 🙂 Here are Andy’s initial troubleshooting thoughts:
1. First, try connecting the lights directly to a battery and just make sure the lights work.
2. If the lamp is already wired, make sure you didn’t switch the wires. You might just have connected the opposite wires to the battery. When you solder the wires to the light bulb socket, it doesn’t matter which wire you use where, because when you connect the battery to the lights, you have to then make sure you connect the correct wire to the correct part of the battery. This is really hard to say in a clear way. 🙂
3. It could also just be that your lamp isn’t turned on, so check to make sure the switch is on. (This is totally something I would do wrong!) 🙂
If that doesn’t do it, let me know and we can try some more ideas. 🙂 But if/when you do get it working, I’d love to see pics! I like to share on my facebook page when people do a tutorial that we posted. Thanks and good luck!
I believe you can cut the lights into strips, and then buy 12 volt electrical wire and solder the two strips together on the soldering pads provided, which she describes in her tutorial here.
This tutorial is fabulous…so detailed and I for 1 appreciate! Cord free lamps offer up a whole new world…thanks!
LOVE this! What if you cleaned off a used/burned out lightbulb, and twirled/stuck the LED strip up around it?
Thank you SO much for sharing this idea. My brain is just spinning now!
Great idea! If you could still solder the wire to the lightbulb socket AND still plug in the lightbulb, I think it could totally work. Just make sure you only use a 12-volt power source and don’t plug it in. If you do it, I’d love to see! 🙂
Great idea! I am sure that I am missing something but why did you unscrew the base of the lamp? When you went back it looked like it did before you unscrewed it. I want to make sure I don’t miss a step. Thanks
You are brilliant. And we are dumb. 🙂 Andy (my husband) and I just sat here trying to figure out why we unscrewed the base of the lamp and can’t come up with a good reason, except that we had taken it off to straighten the lamp – it was bent when be bought it. So please feel free to skip over that unnecessary step. I need to go update the post now. Thank you so much!
This is such a great tutorial! Thank you sharing this with us. I’m book marking and have to try this project out for sure!
Incredible.
Would you mind sharing the shade of rub n buff you used on the lamp? I love the finish!
Fieldstone Hill sent me! Immediately added you to my blog roll and can’t wait for the shaded lamp toot! What to do if the switch is on the cord?! Thank you for sharing!
This is a brilliant idea! I’ve never soldered anything before, but surely I can…right?! 🙂
OMG this is the best thing I’ve seen in months. I actually have a lamp I absolutely loved but I had a problem with the adapter so now the lamp is waiting uselessly for better days. I can’t believe I can fix it now. Thank you so much.
This seems like a great idea for power outages too. No searching in the dark for flashlights, or unsafe candles around small children.
Best tutorial ever! I so need this for my basement end tables. Thanks so much for sharing. Megan
Would it be possible to use wire nuts instead of soldering? Just wondering and love your tutorial.
Hi Carolyn, You could use wire nuts to connect the battery pack to the cord, but not to connect the lights to the lamp.
I could barely find the end to this list of comments 😉 I guess I’m not the only one who thinks this is a GREAT idea.
Love it!
I have been looking for YEARS for cordless lamp for a bathroom with limited outlets. LOVE THIS—though I am eagerly awaiting the “shade version”
Good idea, bad implementation. If the lamp is only for decor and mood lighting, this works, but as a desk lamp, you are better of buying some cheap car led lights. Ebay, 2 bucks for 2, all 12v, in various shapes, especially the ones for in cabin replacement (Door light, center light, you know the one you use to read inside of a car?).
That’s an intriguing idea, but it would still require soldering and hacking because it’s not the right socket size. I’m not sure how you’d get the bulb to stay put. It’s a small money-saver, but not significant, because you’d be spending $2 for 2, vs spending $8 for a 16-foot strip of LED lights and only using 2 feet. Thanks for the idea!
Of course it would still need a bit of rigging around to get it to fit (Use solid wire, like stiff in-wall electrical cable [like 25 cents for a foot at home depot or similar]), but the main reason isn’t really the cost, but the usefulness of the lighting it would provide.
Lampshade tutorial please!! we have a walk out basement and all of our outlets are waist high on the wall. You can just imagine the cord nightmare this presents. I’m thinking maybe putting an old fashioned glass diffuser bowl on the socket, under the shade?
I have an idea about how to do this to a lamp with a lampshade. I haven’t tried it, but I thought I’d throw it out there…
I would solder the wire from the LED’s to the inside of the bulb’s socket. It looks like the wires are thin enough that you can make an indent perpendicular to the threading inside the bulb socket to tuck the wires into it, so they can come out of the socket without interfering with the replacement of the bulb.
Once the bulb is replaced (perhaps with a layer of plastic wrap around the metal base to act as an insulator), you should now have the wires coming out of the bulb socket while the bulb is installed.
Now you just need to wrap the LED’s around the bulb a few times, and connect the battery at the bottom of the lamp, as before.
Alternatively, you could just connect the LED wires to the inside of the socket, glue any cylindrical item (eg. a bundle of straws) vertically into to the socket, and wrap the LED’s around it.
If anyone is able to pull that off, let me know, haha.
sign me up
I love this idea! But what are your thoughts on still being able to use a lamp bulb instead of the strips of led lights?
Thanks! You have to use the low-watt light strip because a regular bulb uses more energy than you can power with batteries.
Have you tried an LED bulb?
This is a great project. i was going to do a lamp for a Christmas present. I may just do this. I’m going to pin this and I will let you know how it goes.
So, I too LOVE this idea. Saw it on Pinterest and I’ve been obsessing over it for a week now. I’ve never soldered before. My first idea was to borrow a soldering iron… Then some brilliant lady asked if you can use Wire nuts/twist on connectors and that sounds way easier with less fire-setting potential. BUT, wouldn’t I still need to solder the LED wires to the light bulb part of the lamp? Final question (what I really want to know): What type of solder did you use, or how would one find out what kind is appropriate for this application?
Fabulous idea but I have a question…does the lamp stay on the whole time or can you turn it off. Sorry for sounding stupid but most of my lamps have the off/on button attached to the cord or up near the light bulb
Not a stupid question at all! The switch should still work, so it will turn on and off. I’m not sure how you’d do it on a lamp which has the on/off switch attached to the lamp though.
Thank you!!! My house was built in 1923 & I have limited outlets in my living room. I’m going to try this with a table lamp very soon. If I suceed, I’m sharing with a friend who also has an old house.
Good Grief! Just buy a battery powered lamp, less trouble, time and expense.
I’m so glad I came across this tutorial! Thank you so much for this! My husband and I are moving to Germany in May and I will now do this to my lamps so I don’t have to have a converter thing just for my lamps because they can be pretty pricey and now I only need the converters for some appliances.
Ok, I love this idea but am confused… can you explain to me how you turn the lamp off please. It seems to me you have to remove the batteries to do this.
You can use the on/off switch just like normal. Hope that helps!
You might have already answered this but, where did you get the string of LED lights?
We got ours at the link below. You can see links to the rest of the materials in the “materials” section of the post. Thanks! http://amzn.to/11AEWki
Ah, I love this post – you are so very clever! Thanks for posting your tutorial and I’ve got this linked to my lamps and lights post too today, for inspiration!
Genius! What a great idea … I just got rid of some flea market chandeliers I used for a photo shoot because of the cord problem. I wonder how much battery power it would take to make them work?
Chandeliers – I hadn’t even thought of that! I wonder if you could hang them over the bathtub if they weren’t wired in to the power source, since it’s usually against code otherwise? Hmm… now you’ve got me thinkin’!
Yay! Keep me posted with what you come up. Bathtub … lighting … sounds scary despite the battery … hmmm
This idea is awesome! I was wondering if you could use this concept on corded christmas candle lights? I have candle lights I use for my windows at Christmas and I am tired of having to look at the cords. I tried the cordless candles but they are not just not the same.(not bright enough & not the right look) Any suggestions would help.
Conceivably you could, but you would have to find a place to store the batteries, so that might be the only downside.
Call me crazy but I would rather have a tripping hazard than a fire hazard. UL-listing is done for a reason.
From our understanding, UL listing is related to heat. These LED lights put off little to no heat. (You can touch it with your finger and there’s no perceptible temperature difference between touching these lights and touching wood.)
Hi,
Do you have to use LED lights or can a regular bulb be used instead?
You have to use the LED lights because they run on 12 volts of power. The regular bulbs require too much power.
Sorry to throw a wet blanket on all you folks who think this is such a great idea. But what the authors of this article fail to mention is that the amount of light put out by this string of LEDs is probably the equivalent of a 5-watt night light – hardly enough for reading a book or paying bills, unless you want to go blind in short order. A working desk needs a good bright light, 75-100 watts at least. Let the authors solve this problem and write another article. Then we can award them a cigar, and I will be the first to say “Amazing! Cool! Awesome!”
We’ve tested the light, and the brightness is somewhere between a 40-watt and 60-watt incandescent bulb. If anyone is concerned about brightness, I’d encourage them to see if a 40- or 60-watt bulb is bright enough for them. If so, this hack – with the 12V battery source – should do the trick.
I got to this post via a link to another link, etc. Not quite sure who recommended this where. However, I wanted to let you know that I’m going to put a link to this on my website. I don’t usually read DIY stuff, but this is perfect for my site about reading (your bookshelves might get a spot too!).
Thanks for a wonderful summer project idea for the kids (who are also bibliophiles). Methinks I can also turn this into some sort of scouting badge 🙂
Anywho – I’ll post the link later today on FindStuff2Read.com
You must think it’s a good idea for your kids to read by a lamp that produces less light than a night light. You must also think it’s a good idea for your kids to make a lamp that will cost about 6000 times more to operate by batteries than it would cost to plug it in the wall. And finally, you must also think it’s a good green idea to teach your kids how to convert a relatively clean-operating lamp that is plugged into a wall outlet into a lamp that will require constant batteries that are filled with poisonous chemicals and will be tossed into a landfill. In reality this is a lamp that will never be used because it’s just a plain idiotic idea. If you want your kids to read, why not have them do some research on the viability of this lamp and then draw their own conclusions on whether this is a good idea. Some questions to ask would include (1) How much actual light, in watts, would this lamp produce, and is that enough to read a book by; (2) How much energy would it consume; (3) How much energy does it take to operate a 100w light bulb – a normal reading lamp; (4) What are batteries made out of; and (5) What happens to batteries when you throw them away? Just saying…
Andrea,
Thank you for your concern. Clearly this is important to you since you posted a comment dismissing this idea, then returned later in the day to respond rudely to one of my readers. We welcome disagreement and critique, but please aim it at the idea and not at the other commenters. Also clearly, this idea is not for you and I’d invite you to simply not do it. Because you seem concerned enough to comment twice, I’ll give you these facts in response to both of your comments.
In response to your concern about brightness: the light is much, much brighter than a nightlight. We compared the light to a 40-watt incandescent bulb and a 60-watt bulb and the amount of light it produces is lighter than the 40-watt and slightly dimmer than the 60-watt. Would I recommend this lamp for someone who needs enough light to perform surgery? No. Does it work for the function we’re suggesting, which is use as a desk lamp? Absolutely. We use it. We read by it.
In response to your concerns about the wasted batteries, if you’d read the post you might’ve noticed that we recommend rechargeable batteries. That’s what we use. We are not constantly replacing the batteries and sending the old ones to the landfill. As a side note, the rechargeable batteries are lasting a long time in our experience and don’t need to be recharged often.
Finally, your question about how many watts of light this produces is not a valid one. I think this is where your confusion lies. Wattage is not a measure of how much light is produced. These lights are about 8 watts. That does not mean they’d produce light equivalent to an 8-watt incandescent bulb. That means that it requires 8 watts of energy to run them. A measurement of lumens would tell you how much light is produced.
Again, thank you for your overwhelming concern. We welcome you to close the window and not attempt this project if you feel so strongly about it.
Thanks for the rebuttal. I got ill and didn’t check back for a LOONG time.
I thought her comments were a bit hilarious, given that my eldest child is 6 (research that she suggested is a bit over his head) and the 3 year old certainly wouldn’t get it!
I’ve never seen such vitriol pointed at a DIY project!
I just found your idea and have been reading about an hour. I’ll probably use the idea for the areas where I want a lamp but don’t mind low wattage so I can use a low wattage bulb — like a nightlight. There are many areas in my home where I want a lamp but don’t necessarily want a lot of light. My reply is really to the “hater” who went on and on about the landfill issue. Her ire should be redirected to the lightbulb companies who have the technology to manufacture lightbulbs which LAST FOREVER but choose not to because they wouldn’t get to sell as many. It’s a consumer driven industry.
I’m also going to add that converting lamps to 12V enables one to use solar energy much easier… in fact I am thinking about converting a desk lamp to solar which is how I got here! Great blog and thank you so much for the info!
Hi Kelly,
Beautiful post! Love this. I’m getting questions on my blog about having lamps on a dining table and remembered this post which I’m sure (deservedly) went viral.
Still looking for how long the batteries last or how often they need recharging.
Don’t understand why people are sometimes are so mean. Most people who who comment on my blog are immensely kind, but maybe every 200 comments or so, someone feels the need to take either me or another reader down a peg or three. I guess it goes with the territory.
I’ve gotten a little braver, but usually, I delete the comment and then call my server to block their IP address. I figure if they don’t have enough self-control to control their hurtful words, I’ll just give them a little hand with their hateful hand.
Thanks again for sharing this brilliant (no pun intended) idea!
xoxo ~ Laurel
I’m here via Laurel’s blog. Always wonder why don’t bloggers delete those hateful posts? Lifestyle blogs are so entertaining, I’m not reading this to get sad. I don’t know how to solder but why not try? Sounds fun.
This. is. freaking. awesome!!!! I am in the midst of creating a “closet office” and I realized, how the heck am I going to see in there!? I bought a staple gun and have been trying to run wires from the kitchen along the edge of the carpet, my god it’s a total mess. I would so much rather try this! You and your hubby are so handy! I will let you know how it goes. And PS, I started my herringbone painting, whoa. Hard work creating those tape squares of equal size…. I WONT GIVE UP!
xx Melissa
madeherlook.blogspot.com
Wow, such a professional. And the light is pretty stinkin awesome! I pinned it but I know darn well I’ll never go anywhere near a soldering kit 🙂 That would be asking for trouble!
One quick question – any ideas on how to add an on/off switch to help save battery power?
Thanks, Kisha! Actually the on/off switch that the lamp comes with still works! So you can still turn it on and off.
such a great idea! i do model home interiors and cords are definitely an issue with aesthetics at times, on desks floating in the middle of the room, etc. however, your instructions could use a bit more detail, as we are not well-versed in the art of soldering, weren’t entirely clear on where to attach the wires in the socket per your photos, and the battery pack is fatter than the space at the bottom of the lamp so it sort of floats on top of the pack. your amazon links for tools was super helpful, but should include the actual solder for us dummies who have never used such a tool. but the lessons were learned, and i will be embarking on another attempt soon, minus the last minute trip to the hardware store…
Great feedback. I’ll make some edits. Thank you so much!
Such a great idea! (Now I’m no longer limited by cord length or outlet placement.) Thanks for sharing your brilliant lamp project!
Hello! I was just wondering if you think it would be possible to combine the 2 lighting projects and make battery powered under cabinet lighting with switch… using a simple light set-up, then kind you use in like paper lanterns?
Awesome idea. You should be able to do that, but the more lights you use, the faster the battery would die. Rechargeables would be great. I’d love to hear about it if you do this!
Finally I found someone who adresses this problem! There is lam cord everywhere in our house. It’s always a pain to hide it completely from view. Thank you!
This looks fantastic, but what about the color of the lights? I prefer a warm color. I have an LED flashlight with a very cold light–the sort you might expect to find inside an industrial freezer. This isn’t a question of brightness or dimness, but of warmth or coolness. How warm or cool are the lights?
They actually sell different light colors, so you can buy a warm light, which is what we did. I was also worried about it being too blue, but the color we bought is a nice soft warm light.
Amazing! And well done. Thank you!
you’re a genius. check this out. marine 12v LED light that fits into standard light bulb socket. No funky soldering. https://www.amazon.com/dp/B004R0EOZQ/ref=as_li_ss_til?tag=viealotheway-20&camp=0&creative=0&linkCode=as4&creativeASIN=B004R0EOZQ&adid=0J1BZFAM1R7E6JEJR8ED&
Oh COOL! We hadn’t seen that yet. It seems like it should work… We’re thinking about ordering it to try it. Thanks!
I was hoping once I saw how to do this I can do it with my computer, printer, scanner, photocopier, fax all of those annoying cords of electronic office machines… alas, not a chance! HaHa
But this is great for “lamps” that I would like to place anywhere in a room not just because it’s close to an outlet! Thanks for the tutorial!
ive found a much simpler solution, take a look at http://www.ipowercorldesslighting.com a great product thats been developed in the UK
Hi. I have the lamp, 8AA battery pack with batteries and have stripped the ends. I put the battery pack (with batteries) to the end of the lamp wires and nothing (I pulled the chain several times to make sure it is on). I am using an 13W UL light bulb (which the lamp recommends). What could I be doing wrong (the lamp was only $35 but I don’t want to have wasted my money on all of the supplies as well).
Hi, You have to use the LED light strips because they use very little power. The battery packs aren’t made to power regular light bulbs. Good luck!
Hi, I loved this idea and just tried it but it doesn’t work. I bought an LED light bulb that screws in and am using an 8-AA battery pack. Do you think the problem is with the light bulb? It’s this one: http://www.amazon.com/Lighting-EVER-Performance-Incandescent-Replacement/dp/B008OBEECC
I’d really appreciate your insight if possible. I’m afraid I just ruined a perfectly good lamp by hacking off the cord!
The bulb you used is 120 volts, which is too much power for the 8 AA batteries. You have to use either the LED light strips, which are 12 volts, or a 12-volt LED bulb.
Hi Kelly,
This is an amazing project. I wanted to suggest that you post it on Hometalk. The Hometalk community will love it (and you’re likely to get a lot of traffic).
Here are some posting tips: http://support.hometalk.com/customer/portal/articles/919210-how-to-engage-readers-on-hometalk
How long does the battery last? This seems a little wasteful, the disposable society stuff that we should be getting away from doesn’t it? It’s clever yes but not environmentally responsible.
Ours has not run out yet. We use rechargeable batteries.
Ok I have bought everything and I am ready to do this!!! My only question is I bought the AA battery packs due to you saying it was much brighter, but where do the battery packs go? I am making 2 lamps to go in my great room as reading lamps or just for mood lighting. There isn’t enough room to fit the packs under the lamp, so do they have to sit out on my end tables? That seems very unsightly!!! Should I do the 9v due to the fact it will fit under the lamp and not be an eye sore? Will this be enough light for what I am wanting to accomplish? I have read everything , and I am sorry if I have failed to find these answers in previous posts. Thanks so much!
If they don’t fit inside your lamps, then yes, you’d have to leave them out on the table. You can try it with a 9V and see if it’s bright enough, then switch it later, if you want. I’m not sure what your specific situation is so I can’t say whether it’ll be bright enough for you.
You can get around having the battery pack on the table. We bought a blue plastic electrical junction box at the hardware store and attached it to the underneath of the table to act as a holder for the battery pack. The cord runs over the side of the table but then goes to the box rather than to the floor like a normal lamp.
This is amazing! And, so timely for me, as I have a small entryway and I have the perfect lamp, but no outlet anywhere nearby. I am tickled pink to find your pin and your tutorial. My lamps have no clue about their upcoming transformation. 🙂
I wanted to use this idea for some of my own lamps, but I can’t seem to get the LED ribbon shipped to Canada. Is there a way around this problem, or do you have any other lighting solutions?
So efficient, so smart! We absolutely love it!
Ananasa.com- Home For Handmade
i’m in love with this blog!and this idea!o_O
congratz!
Great post and very helpful. I am going to tweet this post. 🙂
Ok, as everyone already mentioned, this is frickin’ brilliant!
This would work so well for wall sconces! I mean, provided you just need a bit of ambient lighting I suppose, depending on the brightness. That is how i found this, I was looking for DIY ‘cordless wall sconces’. You have just made my day! THANK YOU for sharing. ^_^
What a great idea!!! I won’t have any cord lamp anymore in my house 😀
Just a question, how to turn on the lamp? The switch has to be between the lamp and the battery? I probably miss something in your how to 🙂
You turn it on just like normal, as long as it’s not the kind of lamp that has the on-off switch on the cord. Otherwise, how you operate the lamp doesn’t change at all. 🙂
I am now emotionally connected to a lamp. That I have never met. That lives on an entirely different continent.
I LOVE THE POOR LOST LAMP MADE GOOD! BLESS IT!
hahaha! Thank you so much. That’ll mean so much to Lamp.
Hi there! Great project! I do have a question though. I read through all the comments to see if you explored the chandelier more. I couldn’t find anything, unless I just read to fast… But I found 12volt led candelabra light bulbs on eBay. But I don’t think this will work because I would need 4 of the bulbs which is 48 volts, right? I guess the question is how do I do this? I looked and I can’t seem to find lower voltage bulbs. Unless I’m looking in the wrong place, which wouldn’t surprise me! Help please!!
We haven’t explored the chandelier idea at all. Andy says it might need more battery power and in that case, you’d probably want to use rechargeables. We don’t know anything about the bulbs to be able to tell you more though. I hope you’re able to figure it out! Good luck!
Love this tutorial. I have done this with one of my lamps and gotten it to work using the LED bulb. One issue I have: the place where my lamp cord is attached to my battery pack cord gets VERY hot. I wrapped the wires with metal tape (Nashua) and then wrapped that with electrical tape. Was that bad? I’m a CPA not an electrician. 🙂
I am so happy I found this!! Not only is it great for eliminating cords, but it’s a fantastic solution in a power outage! The town I live in has been experiencing some major power issues, and it can be difficult to function using a small flashlight lantern. Thanks for the great idea, and simple instructions! 🙂
I have a question, some on and off switch are on the cord, where or how can I put on the on/off switch on the lamp?
Where can I put my switch cause my lamp has it on the cord?
I’m not really sure about that. I know you can buy a switch and wire it in pretty easily, but I’ve never done it.
I hardly create remarks, but i did some searching and wound up here
Lamp Hack: How to Make Any Lamp Cordless – * View Along the Way *.
And I actually do have a couple of questions for
you if you tend not to mind. Is it only me or does it look like some of the comments appear as if they are left by brain dead individuals?
😛 And, if you are writing at other places, I would like to keep up
with anything fresh you have to post. Could you make a list of the complete urls of your communal pages like
your linkedin profile, Facebook page or twitter feed?
I love lamp.
http://www.desismart.com/hats/snapback-cap-n-39.html
Kelly,
I love this idea and can’t wait to get started. Like yours, my project requires only about two feet of the LED light strip. Can you easily use the rest of the strip that doesn’t already have the red and black wires connected to the end? Have you tried this?
Thanks for sharing you ideas and responding to everyone’s posts/comments.
Yes you can definitely use the rest! We’ve found all sorts of different projects to use the leftover strip on… under cabinet lights, inside my closet… it’s oddly addicting.
Do you HAVE to solder the battery pack wires (black and red) to the lamp wire? Can’t you just twirl them together and tape them up with electrical tape? I guess I’m asking if there is another solution other than buying a soldering tool and messing with burning wires? Lol. Thanks. Alex
Yes, but unfortunately you’d still need to solder in order to attach the light strip to the lamp.
The title should be how to make a lamp battery powered – I hate those misleading titles..
– yes I have actually built a desk lamp from scratch, with and original design, and made it battery powered, but I did not think about naming it “cordless” – the same way you don’t name battery operated lamps, cordless – you do sometimes, but not with lamps ..
– everyhting has to be .. oooh so wonderfully different and over the top..
– battery, operated, lamp..
– OK project overall, although those LEDs are very very dim, no comparison to 40w plain bulbs, I have loads of those led strips, the cheap ones you are using are more decorative and don’t light up anything
– I tried a LED fog light for a car – those are 12 V and very bright – and also used the 10 battery pack – the rechargeable batteries are all 1.25 V – the plain AA batteries ones are 1.5 – so in order to use rechargables you need the 10 battery pack
– actually, this is a poorly planned project, not much testing done – where did you plan on putiing the 8 battery pack (or 10 for the rechargeable ones) – there is no room there – you can fit the 9V obviously – but yeah, it is too dim, and doesn’t last that long
– well executed in the end, but very mediocre planning and lighting results
The point of the project is not to find a new way to power it. It’s to find a way to get rid of the cords. They are the problem, not the power source. So the title “cordless” is not at all misleading. You’re really reaching here. Yes, we actually ran tests and it IS brighter than a 40w. You’re using a different kind of strip, so super weird for you to come here and contradict that without any direct experience. Every lamp is different, so the available space for battery packs will be different.
Good attempt at a critical comment, but poorly executed in the end.
Do you have an update on battery life?
At this point, – roughly 2 years later, can you let me know how often you use, and how often you need to change batteries? I want to use in the living room where it would get a lot of use. Sounds really cool for my open plan room.
We still have not changed the batteries, but we don’t use that room very much anymore.
Stupid question here, but would this work with a regular light bulb? Does it have to be the LED lights?
It has to be LED lights because regular bulbs use too much power for the battery packs.
I tried this project and also did not get quite the lumens/brightness that I was looking for. I tried some different LED strip lights and checked my soldering and still no luck. Critical Critic, what car fog light did you use? I have been looking online and can’t seem to find one that can be soldered to a lamp. Let me know what you used. Thanks!
Hi Kelly & ‘Hubby”,
I love this idea. What I would like to know is about the AA battery pack. I have wired & rewired numerous lamps but never made them cordless or ‘battery operated’ (to make that guy happy)! I am a very visible learner & would like to see how it works for a lamp.
Also the ones for the bookshelves, how do you keep the wires & the batteries from showing? I have several units that need light but don’t want to start drilling holes before knowing exactly what I’m doing. Are the connectors long enough to work between shelves or are each shelf wired separately? My shelves are cherry wood, will the led strips be bright enough with the absorption of light?
Thanks! Keep up the great ideas!
Thanks! You can see more about the bookshelf lighting, including placement, here: http://viewalongway.wpengine.com/2012/01/how-to-install-inexpensive-energy-efficient-under-cabinet-lighting/
Hi! I was wondering how and where you fit the 8 battery pack. I am about to do this to my lamp, and then realized that the bottom of the lamp is not big enough for 8 batteries… but would be for a 9 volt.
Oops, just saw the critical critic’s comment about the battery pack. Ouch. Gee whiz. If you’re going to go off on someone’s blog post, you better be positive (as in upbeat) AND correct. She is neither. You handled the response very tactfully 🙂
Thanks Mary! 🙂 It’ll really depend on the lamp whether the bottom is big enough for 8 batteries. Definitely some won’t be! If you definitely wanted to use that particular lamp, you could leave the battery pack out of the lamp and just hide it under some nearby stuff on the desk, but I know that’s not ideal.
Hi…my husband and I create luminaries using gourds….the gourds are hand carved, hand painted and have a 15 watt candelabra bulb inside.
Here’s the challenge: the bulb is lit by an electric cord. The cord can be played with by a cat and then the gourd can be dropped to the floor and broken.
We want to avoid that problem. I wish we could figure out a way to light our luminaries with a battery and be done with cords.
Can you help us? Please check out our luminaries at our website and email us with you thoughts.
thank you!
Before sticking the lights to the shade, try spraying the underside with a mirror finish. It might get your light a little brighter. 🙂
how you make it on and off?
You use the existing switch.
Hi Kelly and Hubby,
I love this, as I have been looking for 4 years for a lighting solution. My hubby and I built a new home with a large great room. I wanted electrical plugs in the floor’ because the living room is so large. Our electrician however talked me out of it. I have been kicking myself in the butt over it ever since. Finally I worded my query correctly and Google brought me here.
After about 3 months, of hemhawing, I actually have all the supplies on hand. BTW, I got the leds and the 8 AA battery pack on Ebay, because it was faster and a bit cheaper than Amazon. My one problem is, I can’t see where exactly the wires are soldered to the light socket. There are 2 small brass lined holes in the socket and then two small pieces of metal in the center. Which of these 2 do I solder my red and black wires to, (the holes or prongs; for lack of a better word), and should I flux the area first?
As for the nay sayers…. don’t knock it until you have tried it. It is simple enough to merely do a temporary connection from the battery pack to the leds to see if it is bright enough for your purposes. If not, another commentor mentioned a 12 Volt AC/DC 5.6 Watt RV Camper Marine Low bulb, which can be purchased on Ebay and Amazon for $10-$15. Cheap enough for something that can last for many years.
Many other folks mentioned they had lamps they loved, but were unusable without an outlet where they needed it. Personally, I bought 2 ugly glass lamps, with even uglier flowers inside, at a garage sale last weekend. I have removed the flowers, cleaned the glass urn-style bodies, and sprayed the inside with first , Looking Glass (supposed to give you the look of an old mirror,when used on glass), then plain silver spray paint. They now look very much like mercury glass, and cost a mere $5 for the pair. The paint, I already had,and the grand total for leds and battery packs online,is less than $18. I could not get equivalent corded lamps for any where near as inexpensive as what I have in them; about $23 for the pair.
My point being…. Thanks so much Kelly and to your hubby. You have solved a problem that has ticked me off for years at our friend/electrician. Keep up with the great work!
Cool project. Am a filmmaker, and will probably use to make a battery-powered light for an upcoming nighttime exterior scene.
But fyi, you don’t actually have to solder your wires together to make that work. If you aren’t able to solder, you can still connect your wires pretty easily and safely. First, take the stripped ends that you plan on connecting, and twist them tightly together. Then take a twist-on wire connector (http://en.wikipedia.org/wiki/Twist-on_wire_connector) and twist the two ends into the connector. Finally, wrap the connector tightly in electrical tape, so that no exposed wire is showing, and there are no gaps between the tape and the connector. And you now have two safely connected wires — no soldering necessary.
We followed this tutorial last night to make a wall sconce. However our 9volt battery would not power our 25w bulb. Do we need a speciality bulb for this project? I was super disappointed when the light didn’t work! Any insight would be so helpful! Thanks!
Yes you need a low-wattage bulb. That’s why used the light strips.
Wow! Seriously what a great blog! I never thought about doing this and boy, what great options this provides! Thank you for sharing.
I love this post! Thank you so much! All of my lamps are going to be cordless now!
Hi I love the hanging lamps. I cant find it on the web site . Would you please tell me if its for sale, and how much .Thank you…..
Great Idea. Very detailed. Is there any option for 240v lamps?
So this might be a stupid question, or asked already. I have the crazy idea of making a variety of table lamps the centerpieces for my wedding reception. To avoid major accidents, I wanted to keep cords off the floor, so I found this genius tutorial! But… I likely will be borrowing lamps from friends, so I’d hate to return them with the cord cut off as you instruct. Is there anyway to do this and keep the cord??
Bravo!
Can you convert a halogen desklamp to battery power?
Thanks for a great blog.
Judy
Whoa! Safety First!
Step 1 should be “check that the cord is NOT plugged in to power”.
Step 2 should then be your Step 6 ” cut off cord near base of lamp”.
This way there is no danger of soldering onto or cutting into live wires.
Otherwise, what a great idea.
Is it possible to use a rechargeable lithium battery. would it give more light or use less power?
The reason the 9v doesn’t work well is because of the lack of voltage. Your typical electronic will run on 120v and a set amount of amps (that’s what your wall socket provides). A 8 pack of AA batteries will make 12v since each AA is 1.5v making it closer to what you would typically be using.
Can the book shelf lighting be made cordless (using the “cordless lamp” method? I’d like to light up a closet shelf unit but there is not a convenient plug.
I’m no electrician by any means, but you provided such detailed step-by-step instructions that it gives me confidence that I might be able to do this! I’d love to get rid of as many cords as I can since they can clutter and build up. Thanks for sharing!
I love your site! but I need help! I decided to try a 12 V bulb I bought online (ChiChinLighting® E26 Screw Base 12 Volt AC/DC 5.6 Watt RV Camper Marine Low Voltage LED Light Bulb, Warm White 1016WW
by ChiChinLighting). I followed your steps (except soldering because I too did not know you had to buy solder wire). In connecting wires by twisting (for a temporary measure until I bought solder wire), lamp WORKED! The next day when I decided to solder, the lamp no longer worked and battery and battery pack seemed they the “blew”. Literally, the batteries had parts of wording off and battery pack had parts ‘blown out’. Now I am worried I will burn down house. Any advice on what I did wrong? I would appreciate any help. thanks.
This is such brief explanation that is really helpful for me at least thanks for sharing!
I would love to see a video on how to do this. I just researched how much cordless lamps cost and I would never pay that amount. Maybe we can make a video for the visual learners.
brilliant work.can we use rechargeable batteries?is it economical?what are the constraints?please reply.
Would it be possible to the 12V LED bulb another user discovered (ChiChinLighting® E26 Screw Base 12 Volt AC/DC 5.6 Watt RV Camper Marine Low Voltage LED Light Bulb, Warm White 1016WW) in the original lamp socket and connect the existing wiring from the socket running through the base of the lamp to a 12 volt household battery?
Sorry, “possible to use the…”
Hi Kelly,
I just came across your blog when I was searching the web to buy a cordless LED standard lamp. It seemed to be a straight forward idea to me but four years after your original blog manufacturers/ retailers still aren’t providing this product. Unbelievable!
There are a very limited number available that have the batteries in the switch handle and they look crap. It is so logical to put the (rechargable) batteries in the lamp base a with an inlet/ connector for a 6v power supply so that it could be recharged from time to time. Open plan living is screaming out for this product. If someone decides to get serious about this they will make millions
Can I mail you my lap and $20 and you could do this for me lol?
Yeah, that’s really so nice idea. Nice blog!
I have a tiffany style owl that I want to change over to battery powered led… maybe wireless as well… any thoughts?
I was wondering can you power a bulb like this by battery? Bulbrite 410303 – 3 Watt – CA5
I have something to share with you!!! There is a great joy in my heart which I want to share with everyone. My name is Caroline Webb from United States. I had a misunderstanding with my lover last year which led us to break up and he never wanted to hear my voice again. He saw a beautiful woman which he find more prettier than me, but as time went on I met god baalam He is a great spell caster. I contacted him through his email and explained everything to him. He said that I shouldn’t worry, that my lover will come back to me on his knees begging for forgiveness before 24 hours.My greatest joy now is that he actually came back to me and fell on his knees begging for forgiveness, and today we are happy and he also cured my Sister’s breast cancer. Do you have any problem? worry no more because godbaalam can provide lasting spell solution to any problems:
If you want your ex back.
You want to be promoted in your office.
If you want to be cured of Herpes, Cancers and other diseases.
You want to be rich.
You want your husband/wife to be yours forever.
Recover your lost money back.
if you want to divorce or stop your divorce.
Pregnancy spell to conceive baby
if you want to win the troubling court cases
if you want to win lottery
Contact Great godbaalam Via Email: godbaalamtemple@gmail.com
I am wondering how often you need to recharge the batteries, if you use the lamp, say, for more than three hours a day? I’d like to have an idea how much recharging I’d have to do before I ask my brilliant, not-available-on-Amazon husband to start ripping apart a few of our lamps. Thank you!!!