I’m starting to suspect that I might talk too much.
BAHAHAHAHA
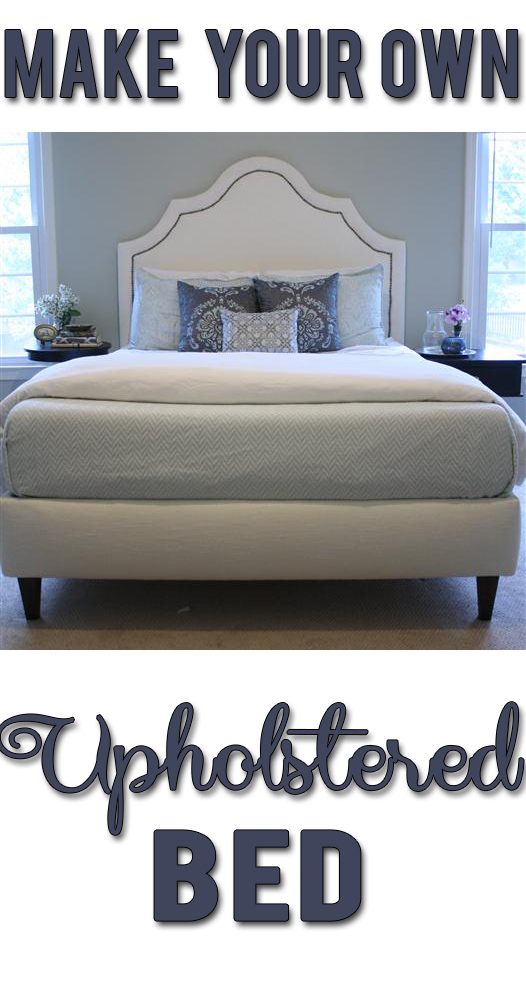
Okay, seriously. I didn’t realize how many posts it would take to do the MOST COMPLETE EVER bed tutorial, but this is the very last post! And look, here’s the after shot!

Why hello there, homemade bed.
So if you’re completely dying right now, rolling your eyes and wanting to throw things at me because this is taking forever – check back with me tomorrow! I’ll have new stuff for you that’s all decorator-y and controversial. (OOH such a tease!)
But back to the bed. If you’ve been following along, we:
- Built a bed
- Decided to scrap it and start over
- Talked about how to choose a great upholstery fabric
- Chose a fabric… then changed our (okay, my) mind
- Shared our supply list and cut a headboard
- Built a bedframe
- Upholstered the bedframe and upholstered the headboard.
Last steps are to make the legs and put the whole thing together.

1. Sculpt the Legs to be Shapely and Beautiful.
(The furniture legs, you guys. Come on.)

Does the hardware store sell furniture stores legs already made? Sure does.
Are we gonna let that stop us from making our own? No sirree.
The legs sell for about $15 each, and we weren’t crazy about any of the options we found. We just wanted something simple and tapered. Plus my husband doesn’t miss a chance to use a power tool, so we opted to make our own. Our DIY version cost about $15 total – for all four legs. And we like these better.
We picked up a 3-foot-long 3-inch square hardwood board and cut it into four 9-inch pieces. Using his table saw, Andy set the miter gauge at about 5 degrees.

And ran each 9-inch piece through lengthwise on three sides:


By the time you get to the fourth side, you’ll have to prop up the bottom so you don’t get a weird angle, like this:

Andy also used his router to soften the corners so they were the tiniest bit rounded. I’m not sure you can even tell in the photo, but I know they’re slightly rounded, so Andy gets husband points for over-achievement.

Then, we just sanded and stained to our little heart’s content. We used a dark walnut stain and a polyurethane top coat.
2. Attach the Legs to Platform
To make our bed sit about 7 inches high off the floor, we had to build out each corner so we had something to attach the legs to. Andy made little blocks using two 2×4 boards nailed together, like this:

Then screwed them to the underside of the platform in each corner. He used both nails and screws — and probably glue, scotch tape, paste and ABC bubble gum to make sure they were super sturdy.

Screw the legs down diagonally into that block.

3. Add Extra Hidden Legs
Just for a little extra support, we added four 2×4 legs in the center of the bed. Four is a bit excessive, but excessiveness is how we roll. Plus we have a toddler who believes that our bed = his trampoline. So extra support it is.
These supports won’t be visible, so they don’t need to be pretty. You can see two of them going vertically here:

4. Attach the Headboard to the Platform
We just used three pieces of scrap wood, screwed each piece into the platform, then into the back of the headboard, like this:
 *PLEASE make sure your screws aren’t so long that they’ll go through the fabric on the front of your headboard!
5. Scotchguard!
The last time we made a bed like this, Bryana pointed out in the comments that we should pretty much dunk it in a giant tank of scotchguard to keep it from staining. SO BRILLIANT, thanks for that suggestion! We haven’t done this yet, but will soon.
* * *
Now that it’s finished, was it worth it? Here’s our total price breakdown:
| Wood supplies (see details here.) | 88.82 |
| Batting (6 yards at $4/yd) | 24.00 |
| Muslin (6 yards at $4/yd) | 24.00 |
| Upholstery fabric (details here) | 141.00 |
| Staples (Spent ~$10, used ~10%) | 1.00 |
| Total | 278.00 |
Not bad when you consider our inspiration piece from Jonathan Adler runs almost $3,000!

One more quick look, just for kicks? Okay, if you insist:

 Hi, I'm Kelly. Glad you're here! This little blog is where I chronicle our efforts to fix up our beaten-down home on a tiny budget. We're not there yet, but here's a peek at the view along the way...


Kelly, you and the hubs obviously have some mad skills! That bed is AWESOME! I can’t believe you made it! I also really love your pillows!
You’re bed is so pretty, I love it so much. I want to make my own bed so bad, but in our house, I’m the “handy” one, and we have NO power tools, like at all. Maybe that’s because no one will let me have any. I’m the girl who gets her finger stuck in a blender and has to walk into the ER with it still attached to my finger.
Maybe someday, I will get around to doing this and then I can refer to your plethora of posts to help me, so it will all have meant something.
Check and see if there is a local tool library! I’m going to start this project soon, hopefully. Unfortunately I have a staple gun and a hammer and that’s about it. But we have a FREE (yay!) tool library that will lend me up to 8 tools at once. 🙂
I still can’t believe how good this looks for DIY. Love those legs 🙂
Wow! It is gorgeous! I’m so jealous. And I REALLY love the pillows too =)
SO pretty! I think we’re definitely going to tackle a headboard, but I wasn’t planning on a bedframe 5 minutes ago (which I love, and totally solves the weird and frumpy bedskirt problem) only because it completely overwhelmed me. BUT now that you guys have done all the hard guinea pig work, maybe I’ll “accidentally” leave this page on the computer screen and see what happens from there. Rick is also not likely to turn down an opportunity to use power tools. 🙂
Wow.zers. That is stinkin’ fantastic! It looks so expensive and chic. LOVE!!
Stunning!
It turned out gorgeous!! Matt will definitely be putting his mad carpenter skills to work on our next bed…going to King size!!
It’s so darn pretty!! I’m with Erin….leaving this page up to nudge the husband in the right direction!!
This bed is gorgeous! You should be very proud. I would love to have this in my house!
You guys are so talented and have mad skills! The bed is extremely gorgeous and not a single detail is overlooked. Love it.
Jessie
http://www.mixandchic.com
Simply stunning! Looks like it belongs in a design magazine feature!
Okay I have been gone WAY too long from blogging. You made a bed!!! Holy crazy cows. That bed is over the top fantastic. Congrats to you both!
This is simply gorgeous, very very impressed! Janell
Hi, new follower here, and I have to tell you how excited I am to have found your blog! AWESOME tutorial, you have some serious talent!
This is so amazing! Congrats on getting on the top 6 on Not Just a Housewife. I voted for you!
The bed looks great! But what I really want to know is, how did you get the corners so straight? that is really the how to…
Trial and error mostly! 🙂 I have a whole new admiration for “real” upholsterers!
Beautiful! This boxspring cover is at the top of my DIY project ideas for 2012! You guys did an excellent job. Voting for you on NJAH!
Thank you Beth! And thanks for the vote. 🙂 Can’t wait to see how your boxspring turns out.
This is absolutely GORGEOUS!!! I love it! I found you through NJAH and will be following for sure!
What a beautiful bed/headboard. Congrats on making the top 6 at NJAH!
Amazing! Found you from the Not Just a Housewife contest and this is spectacular. You guys put a lot of work into this, I am so impressed. it’s absolutely gorgeous. Way to be resourceful and thrifty.
Jen
I just found you on the web – I love this project! I so want to do this, but I’m not sure it’s quite the right time just yet. I am bookmarking though. All the photos (I read through all your posts about it) were really helpful! Plus, you don’t necessarily need to buy the power tools, here we can rent them for a day or three.
This is very impressive! I love the design so much I pinned it. 🙂 Congrats!
Thank you for this post… making a new bed is going to be my husband and my summer project now for sure!
I used a lot more batting – I got the 8 oz – how did you make only 6 yards work ? I got 60″ and did 3 layers
What’s your email?? I’ll email photos 😀
Let me tell you…that nail head trim is like finding a needle in a haystack!!!!!
kelly@vatwblog.com. Send ’em on! Can’t wait to see! 🙂
what are the measurements of this headboard? I want to make one in this shape but cannot find the measurements of the plywood! Thanks and looks awesome!
I know it is so hard to find specifics from that tutorial! I wish I’d been more organized, I’m sorry! 🙂 We made a diagram of the headboard which you can check out here: https://lh6.googleusercontent.com/_6ROPl02mGZo/TViW9MVd-zI/AAAAAAAAB7k/XUEI3TR0mFk/s912/headboard%20plans.jpg
Hope that helps!
I was all ready to make an upholstered headboard this weekend and then I see your upholstered bed! Sheesh…. Now I am tempted. It’s gorgeous!!
OMG. You guys are so cute and so handy! We just bought a house and I just had a baby so being at home, I’m dreaming up all these great DIY projects and this is one of them. Wonder how old she’ll need to be before we can accomplish this. Thanks for the inspiration!
Love the bed- but also love your wall color. Mind sharing the color?
Kelly, First and foremost I am blown away at the outcome of you bed. It’s amazing. You guys did a fantastic job!! And secondly I am blown away by the cost. That is astonishing. I have personally made two upholstered headboards, but they were just the headboards! You guys built a whole bed. I love it!!!
I just wanted to let you know that I featured your headboard in a blog post of my favorite DIY headboard roundups at this link: http://www.lilikoijoy.com/2013/04/15-favorite-diy-upholstered-headboards.html
Thank you for inspiring me. I love this bed! Sharon
Hello kelly,
I just wanted to start off by saying that this is amazing. I am a college student and am moving into an apartment in Aug. I have my mind set on doing this! I do have a question that I hope you could answer for me though. I have a full bed; is there any way you could somehow give me measurements to make this in full size instead of queen? This would be wonderful if you could share!
Thank you so much! Hope to hear soon!
I don’t have the measurements for a full size bed, but if you could figure out how much smaller a full size mattress is than a queen, you should be able to just subtract that many inches from everything. Good luck and congratulations on the new apartment!
You are talented! Measuring + Cutting…not so much my talent.
I will have to buy a copy cat for my guest room!
I had seen your blog before over the past couple years but never took the time to explore it. This week I did and now I’m hooked. My bed is a copycat of the well-loved Crate & Barrel Colette bed. I bought mine, but if I had seen this tutorial beforehand, I might have tried to DIY it!
I just love this bed, it is amazing 🙂 I have to try to convince my husband to help me make something like this. Job well done!
this is over the top awesome. it’s one thing to make the headboard…but to make the entire bed…I am in complete awe. Ya’ll did an amazing job. It looks so professional. Great stuff.
WOW! It looks super-amazing. Love that you were able to taper the legs!
Thank you for posting this! Wow! I’ve been wanting the Jonathan Alder headboard for years. Ok..this may have to wait till I’m back in a house and have all my tools…but I love the finish product and the price!
Carolyn